Flea Finds and Flipping
Going to flea markets, thrift stores, and the like is always very fun, but also a little deflating. If I have something specific in mind that I'm looking for, there will be about a 4.2% chance that I'll find it. Such is the case, though, when the available merchandise is always limited and never constant. So I try to not have any expectations, which really just means that I try super hard NOT to think about the thing that I'm looking for, which in turn makes me subconsciously look for it even harder? That, and I'm the absolute worst at haggling for a lower price at flea markets. I get into this "let-me-support-small-business-by-paying-full-price" mentality, and then I feel like I got duped as soon as I walk away with the purchase. Womp. So you can imagine my surprise when I spotted a potentially cool bookshelf for a pretty decent price at the Georgetown Flea Market a few months ago.


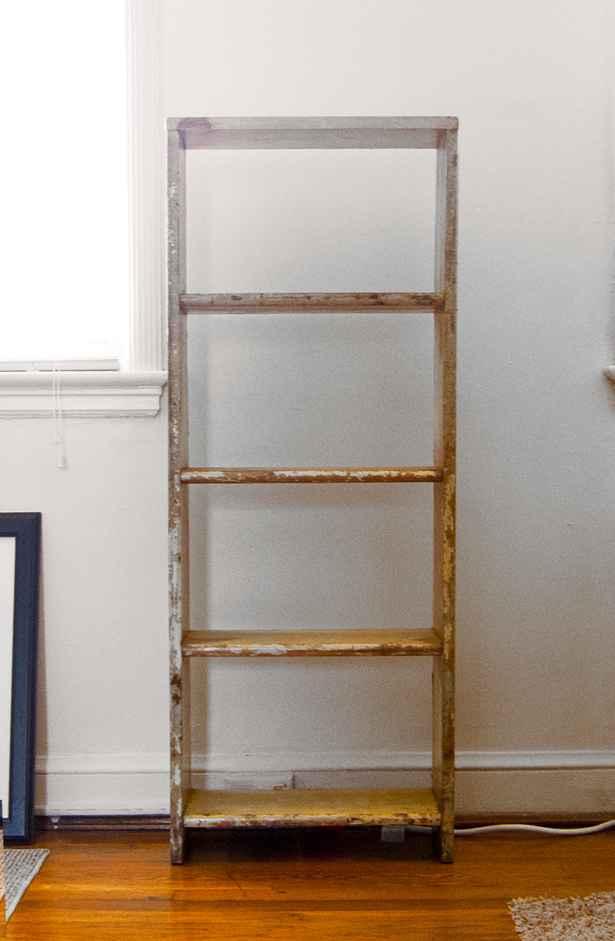
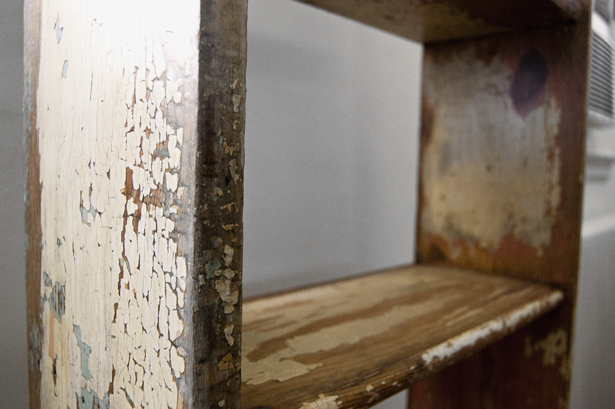
It was apparently salvaged from an old barn, and the vendor treated it with polyurethane. I really dig the layers of paint that it has taken over time, especially the shade of blue in the detail shot above. Most people would probably want to strip this down to the natural wood, but I decided to work with the layers instead. I bought it with every intention of somehow making it a little less basic and a little more polished/modern/intentional, so it ended up sitting in random corners of my apartment for months while I debated on how to tackle it. My initial idea was to attempt to modernize it by lining the back with a cool, modern fabric. I got a few fabric samples to test them out against the bookcase, but none of them seemed to gel quite right. I think that the fabric looked way too contrived when contrasted against the quality and texture of the wood. I decided to drop the fabric (by literally using it as a drop cloth later? shame..) and move to a more logical approach.
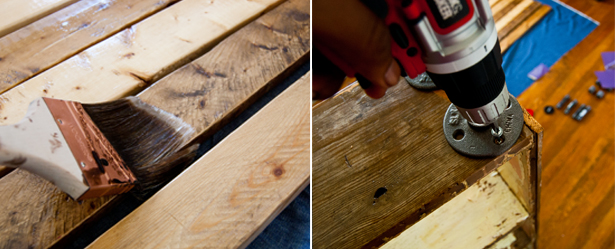
I started to think that a more natural way to finish off the bookcase was to enclose it in a similar wood that would compliment the original structure. I did want to keep some contrast, though, and that would come in the form of metal piping, but more on that in a bit. I took a trip to this awesome lumber yard/hardware store (ABC Distributors in Arlington, VA... super helpful service and a huge selection of great stuff.) Since the bookcase was already pretty rustic, I wanted to find some slats for the back that were also kind of worn and imperfect. I searched the yard like a noob until I happened upon a bunch of scrap slats of pine wood that were about 7.5 feet long. The guys were able to cut 8 pieces down to 44 inches, which is the height of the bookcase. I snagged the wood for a total of $8, which I was super stoked about. Stinginess for the win! While I was there, I figured that I would ask if they could trim about four inches from the bottom of the bookshelf (yes, I brought it with me) so that I could easily add metal piping for the feet. Since it was a pretty minor thing, they happily obliged and I did a little (internal) happy dance for hitting two birds with one stone for a grand total of 8 bucks. I then headed to The Home Depot, aka the world in which I spend entirely too much time and money, to pick up the piping for the new legs and some polyurethane for the unfinished pine slats. I grabbed three pieces of pipe for each of the four legs: a flange that would be attached to the wood, a pipe (formally called a nipple) that would twist into the flange, and an end cap that would twist onto the pipe.
It was pretty straightforward from this point on: I sanded the wood to smooth out the rough edges and to prep it for the polyurethane (note to self: sanding indoors isn't a very pleasant experience... lesson learned.) I applied one coat of poly, let it dry for about four hours, lightly sanded it down again, and applied a second coat to finish it off. While the poly was drying, I used screws to attach the flanges to the newly flattened bottom of the bookcase, and just twisted the pipes and caps into each of the four flanges. Quick and simple. After letting the polyurethane dry for about 18 hours, I just used one-inch nails to attach each slat to the back of the bookcase.
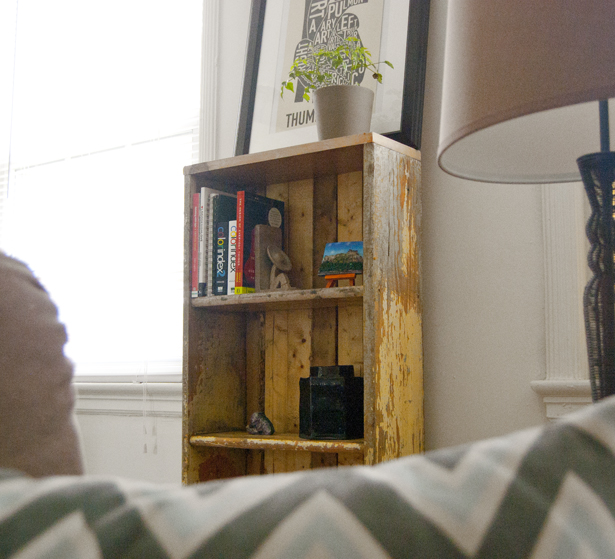
Now for some glamor shots just because:
I'll eventually get restless with this piece and do something completely different to it that will probably involve stripping it completely, but this was a fun experiment in changing a pretty basic flea market find into a more rustic/modern piece.


